- 1 Introduction
- 2 Page Types
- 3 Directories
- 4 Editing
- 5 Different Types of Pages
- 6 Prototype Pages
- 7 XoWiki Configuration
- 8 Syndication
- 9 Including XoWiki Pages in other OpenACS applications
- 10 More Information about XoWiki
- A Credits
XoWiki Manual
1 Introduction
 XoWiki is a wiki implementation for
OpenACS in XoTcl .
Instead of trying to implement the full set of wiki markup commands
in systems like MediaWiki, XoWiki is based on a rich text editor
and focuses more on integration with OpenACS (e.g. categories,
general comments, adp-includes, ad-substitution of template
variables). XoWiki combines aspects of wikis (ease of
page-creation) with aspects of a content management system
(revisions, reusable content, multiple languages, page
templates).
XoWiki allows users to comment on pages (using the general comments package of OpenACS), to tag pages in del.icio.us style and create folksonomies and to provide user-tracking (show user, which pages he has visited last or which are the most popular pages).
In contrary to plain text wikis, XoWiki supports the easy
production of complex HTML markups on wiki pages through the rich
text editor ![]() Xinha . It is quite
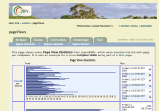
easy to reuse HTML-formatted text as wiki-pages (see right, the
table with the page view statistics from Learn@WU, see below for
examples for importing manual pages or the import of some HTML
documentation).
Xinha . It is quite
easy to reuse HTML-formatted text as wiki-pages (see right, the
table with the page view statistics from Learn@WU, see below for
examples for importing manual pages or the import of some HTML
documentation).
Furthermore, XoWiki allows to define different types of links such one could define for example link to lookup words from dictionaries or to define e.g. different kind of word relationships (like synonyms, etc.). XoWiki supports pages in multiple languages and is localized (currently only for English and German).
Starting with version 0.8 XoWiki supports also plain pages which are edited without a rich text widget (therefore, the markup is not htmlified). All kind of pages can be linked arbitrarily and nested. Starting with XoWiki 0.32, files (e.g. pdf files) and images can be stored directly in an XoWiki instance.
2 Page Types
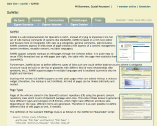 Wiki-pages are stored in the OpenACS Content
Repository (CR) using the generic content repository class which is
part of OpenACS package xotcl-core. The class CrClass allows in
general to define different types and subtypes of CR entries, which
might have different attribute sets. Depending on the type,
different forms are generated. Therefore it is as well possible to
define different kind of wiki pages as well, if needed.
The definition of the standard ::xowiki::Page Class is defined as an content repository item (::Generic::CrItem) and looks as follows:
::Generic::CrClass create ::xowiki::Page -superclass ::Generic::CrItem
     -pretty_name "XoWiki Page" -pretty_plural "XoWiki Pages"
     -table_name "xowiki_page" -id_column "page_id"
Currently, the XoWiki packages defines 4 CrClasses: ::xowiki::Page,
::xowiki::PlainPage, ::xowiki::PageTemplate,
::xowiki::PageInstance, ::xowiki::Object and ::xowiki::File. These
classes are described later in this document.
3 Directories
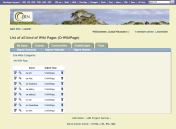 XoWiki organizes the pages in folders based on the OpenACS content
repository. There is typically one folder per XoWiki instance. The
organization via content repository folders has the consequence
that page names have to be unique per folder (and therefore per
XoWiki instance). So, an XoWiki instance represents a common
namespace for the wiki entries. Certainly, it is possible to use
multiple instances of the wiki, by simply mounting the XoWiki
several times over the site map, or one can use per-community
wikis, when XoWiki is mounted in .LRN inside a community.
Every XoWiki instance can be configured by a series of parameters that control its behavior and appearance. The administrator of an XoWiki instance can for example determine the start page (see below for index_page in the configuration section) or whether users should be allowed to comment pages (via OpenACS general comment package), or whether del.icio.us style user-tags should be allowed for this instance. More details are below.
3.1 Naming
The administrator of an XoWiki instance can as well determine, how page names should be constructed. Starting with XoWiki 0.30, per default all page names are normalized by transforming spaces into underscores to provide nicer links and make the spelling of the names easier to control. The naming convention is determined by the parameter subst_blank_in_name.
3.2 Revisions
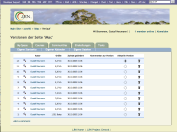 XoWiki keeps for every file a revision
history. When an entry is updated, the old version is still kept in
the revision history. This makes it possible to revert to earlier
versions at arbitrary times. Depending on the permission policies,
users with the right to see the revisions get a link in the XoWiki
menu bar. The figure on the right displays the revision history of
a page.
4 Editing
The pages in XoWiki are typically edited via a rich-text editor such as rte or xinha (see screen-shots). Therefore, XoWiki pages are actually HTML pages. Simple markups such as bold/italic words can be provided via the controls of the rich text widget. This makes it furthermore easy to import content from popular text processing software packages via drag and drop, to use tables and include images, if desired, or reuse HTML content such as documentations.
XoWiki provides certain special markups for creating named links, or for
inclusion of elements and for variable
substitutions.
4.1 Named Links
In general, all links are specified between double square brackets.
4.1.1 Intra-Wiki Links
 Intra-Wiki links can be
inserted using the MediaWiki syntax
   [[pageReference]]
   [[pageReference|link label]]
   [[pageReference|link label|options]]
where a pageReference is either a page name (with or without language prefix) referring to pages of the same instance, or a reference pointing to a named page on the same sever but in a different XoWiki instance (starting with //), a or a link to an external page (starting with http://).
Typically, wiki page names have a two character page prefix denoting its natural language. If in a page name in a page reference does not contain a language prefix, the language prefix of the including page is used per default.
The optional link label is used to provide the string
to be clicked. If the link label is not provided, the
pageReference is used as link label. If the link
label is provided, further options might be specified. XoWiki
supports cssclass (the CSS class for the link),
title and target as possible options.
[[home|My Homepage|-title "Gustaf Neumann's Home Page" -target _blank]]
4.1.2 Language Links
 An intra-language
link is a link pointing to the same information in another
language. Syntactically, an intra-language link starts with a
colon. If such a link is contained in a page, the link is not
rendered inline, but is added to the language section of the links.
The following markup defines that for the current page there is an
English version with the page name "en::GN".
[[:en:GN]]
An intra-language link is listed with a small flag symbol among other references. If the page does not exist, it can be created by clicking on the flag and editing the new page.
4.1.3 File and Image Links
A file link is a link to a file such as a .pdf-file or a .zip-file.
[[file:handbook.pdf|The documentation of .LRN]]When clicking on a file link (visualized by a small file icon), the file is downloaded. The meta-data of the file (size, name, type, description, etc.) is displayed via the administration interface or via opening the file with the download option (default). When file link is inserted and the referenced file does not exist, XoWiki presents the square brackets as usual to allow the user to upload the file to the XoWiki folder.
An image link is very similar to a file link, but references an image (content-type image/*).
[[image:gustaf.png|One of the few nice Photos..]]
When an image link is rendered the referenced image is rendered inline. Actually, the line above can be written slightly simplified as well as
[[gustaf.png|One of the few nice Photos..]]
in cases, where the file extension resolves to an image content type. When the link is written as
[[file:gustaf.png|One of the few nice Photos..]]
XoWiki renders this markup as a link to download the image instead of rendering the image inline.
After the title of the image, various options for rendering the image can be provided. In the following example, the image floats to the right, is scaled to a width of 100px and opens the specified url, when the image is clicked on.
[[gustaf.png|One of the few nice Photos..|-float right -width 100px -href http://...]]
The following parameters may be used as options for images. All but the first two options are CSS properties passed as the style of the image.
href cssclass float width height padding padding-right padding-left padding-top padding-bottom margin margin-left margin-right margin-top margin-bottom border border-width position top botton left right
4.1.4 Embedding Flash, Audio, CSS and JavaScript
Flash
Similar to images, files stored in an XoWiki instance might be referenced to present multimedia content. For example, when flash content is packed into a single .swf file, it can be embedded by the following markup:
[[swf:demo.swf|Demo]]
The applicable options for flash content are
width height bgcolor version
quality wmode align salign play loop menu
scale
For the meaning and possible values of these parameters, see [[http://www.adobe.com/cfusion/knowledgebase/index.cfm?id=tn_12701|Adobe Flash]]. The inclusion of flash files is realized via SWF Object
Audio
There exists multiple approaches how to embed audio in web
pages. A fairly common, but not standardized way is the EMBED tag,
originally proposed by Netscape. When file-links are provided with
additional options, XoWiki uses EMBED for rendering (see the
following example).
[[file:Birds.mp3|Birds|-height 20 -autostart false]]
Valid options are
width height align pluginspage pluginurl
hidden href target
autostart loop volume controls controller
mastersound starttime endtime
For the meaning of this options, consult e.g. [[http://www.htmlcodetutorial.com/embeddedobjects/_EMBED.html|Embed Code Tutorial]]
CSS and Javascript
Finally, it is possible to include for certain pages special CSS and or JavaScript files. If a page contains for example:
[[my-style.css]]
a css file entry with he specified name is included during
rendering. The file is taken from the actual XoWiki instance. If
the file does not exist, xowiki provides an upload link like for
all unknown pages. JavaScript files are handled exactly the same
way.
[[effects.js]]
4.1.5 Typed Links
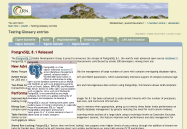 XoWiki
supports as well an experimental feature of typed
links, where a user can define any kind of relations to
other wiki pages, such as inter- or intra-wiki-page links. In
general, this could for example be used to inter-term relations
(e.g. synonym, hypernym, antonym, ...) in a dictionary, or similar
other usages. The type of the link is specified before the
(optional) language prefix. We use the following syntax.
[[link_type:?lang:?name?|link label?]]When a new link type is defined it is possible to define the link resolver and a renderer of this link type by sub-classing the class ::xowiki::Link. XoWiki 0.24 comes with a sample implementation of link type glossary. In this implementation, a glossary is a separate XoWiki instance (named glossary), which contains the word definitions. Every XoWiki instance can refer to this glossary and link to this words. The text shown on the right side contains for example a typed link for PostgreSQL, which is defined as:
The [[glossary:PostgreSQL]] Global Development Group ...In order to resolve the term, XoWiki uses a link-specific resolver that locates an instance named glossary. It looks in the site nodes for sister-nodes of the xowiki instance and then for sister nodes in its parent node and so on. When the resolver can locate the XoWiki instance and the entry for PostgreSQL, it renders the entry with a special symbol (see screenshot). If the resolver finds the XoWiki instance, but not the word, it sets the link on the square bracket to add a dictionary definition in the glossary. When this link is activated it displays the XoWiki entry in a popup window. The XoWiki page from the glossary is retrieved via an AJAX call in the background (tested on Firefox, Safari and IE).
4.2 Included Content: Includelets
XoWiki supports inclusion of (a) predefined includelets, of (b) wiki pages and in general, of (c) arbitrary selfcontainted ADP pages. Syntactically, all includelets are specified in MediaWiki syntax; the includelet specification is surrounded by double curly braces.
4.2.1 Predefined Includeletes
XoWiki supports a set of pre-defined includelets, which are
defined as classes in the ::xowiki::includelet::* namespace. When
an includelet is included in a page, an instance of the includelet
is created for each occurrence during rendering of the page. The
simplest includelet is the RSS button, which can be included in the
page as follows:
{{rss-button}}}
...text...
Every includelet accepts at least the two parameters decoration and title, which are specified in a Tcl-like syntax with a preceding dash (e.g. -decoration ... and -title ...). The decoration can be one of the following values:
- portlet: The includelet is rendered like a DotLRN style portlet (i.e. with a title and title link)
- plain: The includelet is placed into div which has as CSS class the class of the includelet.
- rightbox: The includelet is like plain, but placed in an additional div with class rightbox. Per default, this includelet is flushed to the right of the display window.
- none: The includelet is placed incline as is into the text.
The default configuration for the decoration is
determined by the configuration of the includelet. For example, for
the rss-button the default decoration is
none.
XoWiki comes with a set of predefined includelets which can be configured as well in many different ways. Below is a list of a few includelets with their configurations. Some of these includelets are shown in the later sections.
  {{rss-button}}
  {{categories -title "Table of Contents" -tree_name *toc* -open_page de:iMac}}
  {{categories-recent -title "Recently Changed Pages by Categories"}}
  {{recent -title "Recently Changed Pages"}}
  {{last-visited -title "Last Visited" -max_entries 10}}
  {{most-popular -title "Most Popular" -max_entries 10}}
  {{tags -limit 20}}
  {{presence -interval "10 minutes" -max_users 40}}
  {{toc -open_page de:imac -style folder}}
  {{book}}
XoWiki supports an introspective includelet, which lists the names of the available includelets of an XoWiki installation together with the includelet specific options and default values:
{{available-includelets}}
The introspective includelet outputs for a fresh XoWiki instance the following:
- {{activity-graph -max_edges 70 -cutoff 0.1 -max_activities:integer 100 -show_anonymous message}}
- {{available-includelets}}
- {{book -category_id -menu_buttons edit -locale ""}}
- {{bookmarklet-button -siteurl "" -label ""}}
- {{categories -tree_name "" -tree_style:boolean 1 -no_tree_name:boolean 0 -count:boolean 0 -summary:boolean 0 -locale "" -open_page "" -order_items_by title,asc -category_ids "" -except_category_ids "" -ordered_composite}}
- {{categories-recent -max_entries:integer 10 -tree_name "" -locale ""}}
- {{collab-graph -max_edges 70 -cutoff 0.1 -show_anonymous message -user_id}}
- {{composite-form -edit_links:boolean false -pages "" -ordered_pages}}
- {{copy-item-button -page_id -alt copy -book_mode false}}
- {{create-item-button -page_id -alt new -book_mode false}}
- {{creation-date -source "" -format %m-%d-%Y}}
- {{delete-item-button -page_id -title Delete -alt delete -book_mode false}}
- {{delicious -description "" -tags "" -url}}
- {{digg -description "" -url}}
- {{edit-item-button -page_id -title Edit -alt edit -book_mode false}}
- {{form-menu -form_item_id:integer -buttons new answers -button_objs -return_url}}
- {{form-usages -form_item_id:integer -form -orderby _last_modified,desc -publish_status ready -field_names -category_id -unless -where -csv true -with_categories}}
- {{get -variable -form_variable -source ""}}
- {{item-button}}
- {{last-visited -max_entries:integer 20}}
- {{most-frequent-visitors -max_entries:integer 15}}
- {{most-popular -max_entries:integer 10 -interval}}
- {{my-categories -summary 1}}
- {{my-general-comments}}
- {{my-references}}
- {{my-refers}}
- {{my-tags -summary 1}}
- {{my-yahoo-publisher -publisher "" -rssurl}}
- {{presence -interval 10 minutes -max_users:integer 40 -show_anonymous summary -page}}
- {{recent -max_entries:integer 10 -allow_edit:boolean false -allow_delete:boolean false}}
- {{rss-button -span 10d -name_filter -entries_of -title}}
- {{rss-client -url:required -max_entries:integer 15}}
- {{selection -edit_links:boolean true -pages "" -ordered_pages "" -source -menu_buttons edit}}
- {{set-parameter}}
- {{tags -limit:integer 20 -summary:boolean 0 -popular:boolean 0 -page}}
- {{timeline -user_id -data timeline-data -interval1 DAY -interval2 MONTH}}
- {{toc -style "" -open_page "" -book_mode false -ajax true -expand_all false -remove_levels 0 -category_id -locale "" -source ""}}
- {{unread-items -max_entries:integer 20}}
- {{user-timeline -user_id -data timeline-data -interval1 DAY -interval2 MONTH}}
- {{view-item-button -page_id -title View -alt view -link "" -book_mode false}}
- {{vspace -height "" -width ""}}
4.2.2 Inclusion of ADP-content
XoWiki allows to include adp-pages. Syntactically, these including are defined in MediaWiki syntax, surrounded by double curly braces. The include specification starts with "adp", followed by the adp-page, followed by name/value pairs of variables passed to the adp page. The following example includes the mini-calendar from the calendar package in a wiki page.
 ...text...
 {{adp /packages/calendar/www/mini-calendar {view day base_url /dotlrn/calendar/} }}
 ...text...
XoWiki comes with a set of predefined adp pages, which are placed
into the www/portlets subdirectories. Some of these includes are
shown in the later sections. These include the following samples:
  {{adp portlets/weblog-mini-calendar}}
  {{adp portlets/calendar-portlet }}
  {{adp portlets/forums-portlet}}
Note, that the latter two examples require to have calendar and dotlrn installed on your system.
4.2.3 Inclusion of Wiki Pages
In a similar style, an XoWiki page might contain other XoWiki pages, These nested pages are specified as includelets, where the name of the wiki page is written between the double curly braces. For example, when the following snippet is used in an XoWiki page, it will be replaced during rendering by the page named en:GN.
{{en:GN}}
On the rendered page, one can navigate to the included page by clicking on the title of the included item. The inclusion depth is limited to avoid infinite recursions and too expensive pages. Currently, XoWiki does not store the inclusion structure through part_of links and does not include the references of the included pages for the including page.
4.3 Block Marker

 To control the style of the pages, XoWiki supports
block-markers similar as in www.apfelwiki.de.
These block-markers can be used mark different <div> sections
without the need to go into the details of the html-area. In
particular, XoWiki supports currently the following
block-markers.
  >>content<<
  >>side-bar<<
  >>left-col<<
  >>left-col30<<
  >>right-col<<
  >>right-col70<<
  >>box<<
Every block-marker has to be terminated by an empty block-marker.
>><<
4.4 Substitutions and Template Variables
XoWiki performs always link substitution (double square brackets) and inclusion substitutions (double curly braces). If not turned off (programmatically), XoWiki per forms as well variable substitutions (names between at-signs in ADP-style). If this page contains e.g. Substitutions and Template Variables, this string will be substituted by the actual title of the wiki page.
4.4.1 Substitutions
The ADP-substitutions are turned on by default in the XoWiki package. Substitution can be activated/deactivated programmatically by a flag of the render method. From the user interface (when a page is edited), all substitutions (links, includes and variables) can be prevented by preceding the markup (double square brackets, double curly brackets, at-signs) with a backslash.
4.4.2 Template Variables
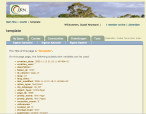
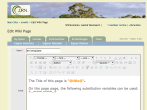 The permissible substitution variable names are the union of the
fields of the instance record of this wiki page and the instance
variables of the page instance used for rendering. So, if the class
wiki-page is specialized (subclassed) and extended with more
variables, these will be available. Programmatically, it is as well
straightforward to add instance variables to the page object before
rendering. The set of variables can be as well extended via
PageTemplates (see below). The permissible values can be obtained
by the special substitution variable @__template_variables__@. It
is not surprising but nice that the rich-text properties applied to
the substitution variables are applied on the substituted values as
well (see right).
4.5 File Selector
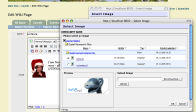 XoWiki provides support an OpenACS based file-selector which is
activated though the xinha interface. The file selector is using a
newly developed plugin for xinha. The file-selector has two modes:
'file' or 'image'. In image mode, only image files can be selected
(mime content type image/*). In file-mode either all files are
selected, or files of a certain type can be selected. For more
details, see the documentation of the template::widget::richtext in
OpenACS 5.2.2 or newer.
XoWiki uses the file-selector in image mode to insert images, and in file-mode to provide internal links to files in the file store. In the future, it should be possible to provide more safety by disabling for the common user all access to URLs, such that only safe URLs links/image can be inserted (removing external link, entry-fields for URLs and HTML mode).
4.6 Examples
The following sections show a few examples of nested pages.
4.6.1 OpenACS.org Homepage modeled with XoWiki
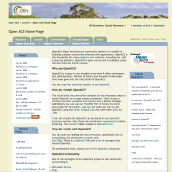 On the figure on the right contains a more complex example of an
XoWiki page which could be used e.g. for a home-page. The page
contains the major parts of the OpenACS homepage. This XoWiki page
uses essentially a 25% left column, where two XoWiki pages are
included and a 25% right column, containing as well XoWiki pages.
The main text is part of the page "OpenACS Home Page".
  >>left-col25<<
  {{en:News}}
  {{en:Recent_Posts}}
  >><<
  >>right-col25<<
  {{en:About_OpenACS}}
  {{en:Featured_Articles}}
  >><<

  OpenACS (Open Architecture Community System) is a toolkit for building scalable, community-oriented
  web applications. OpenACS is the foundation for many products and websites, including the
  .LRN e-learning platform. OpenACS is open source and is available under the GNU
  General Public License.
  ...
4.6.2 A Weblog implemented with XoWiki
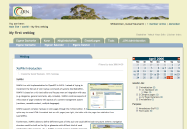 Starting with XoWiki 0.26, XoWiki comes with
a simple weblog implementation. The XoWiki Pages of the repository
can be viewed in a weblog style, where every page is treated as a
posting. The entries are paginated (per default 10 entries per
page).
The sidebar contains a mini-calendar, where the number of postings per day are included. By clicking on these days it is possible to filter this entries for this day. The used categories are displayed below the mini-calendar. The categories are shown with the number of entries. Clicking on this numbers causes filtering by categories. By clicking on the "Weblog" label, the filtering is removed.
  >>content<<
  {{weblog-portlet}}
  >><<
  >>sidebar<<
  {{adp portlets/weblog-mini-calendar}}
  {{categories-portlet -count 1 -skin plain}}
  >><<
5 Different Types of Pages

 Starting with version 0.8, XoWiki supports different types of
pages. The index page presents all types of available pages. These
pages do not loose their type during revisions. Every page type can
have a different edit form, which is used, whenever the page is
edited. The "new" button on the edit display is used to edit a new
page of the same type as the current page.
The screen-shots on the right show the edit screen of a plain wiki page. This page includes two other wiki pages. In this example, the plain text page includes two rich-text pages.
5.1 Page Templates and Page Instances

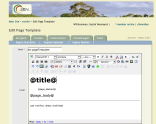 Starting with version 0.13 XoWiki supports Page
Templates. A page template is comparable with a master
slide in presentation graphics like in PowerPoint. In general, a
page template could also be seen as a kind of WYSIWYG ADP-page. A
Page Template serves two purposes: It allows (a) arbitrary input
values to be used within a page and (b) to determine the layout of
associated pages. The page template can contain e.g. block-markers
as described above for denoting sidebars etc. The page templates
have the advantage that the text to be entered can be completely
free of markup, making it quite easy for untrained people to use.
Technically, a page template is like an ordinary wiki page
containing template variables or ADP-includes etc. However, when
the page template is viewed, the template variables are not
substituted.
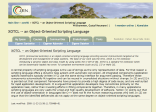
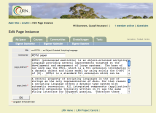 Another important property of the page templates is that it can be
used to provide values for (additional) template variables through
a form interface. All non-resolvable variables (undefined template
variables) are treated as input fields in the auto-generated
forms.
After defining a page template one can create according
Page Instances. When a page instance is created,
one can choose the page template to be used from a drop-down list.
When this is done, XoWiki creates automatically for the
unresolvable template variables a form for entering values for
those variables. The screen shots on the right show the generated
edit form and the rendered page instance.
5.2 Forms and FormPages
Starting with XoWiki 0.60, XoWiki supports ::xowiki::Form and
::xowiki::FormPage, which are successors of ::xowiki::PageTemplate
and ::xowiki::PageInstance, but it is not fully backwards
compatible. The major improvements from a user perspective of
::xowiki::Form to ::xowiki::PageTemplate are
- one step definition of form entries
- auto-generated input forms and manually generated HTML forms (or combinations)
- specification of summary tables containing form entries
- named/unnamed entries
- categories can be turned on/of on a per form basis
- entry specific localization of form fields
- support for wym-editor
5.2.1 Form-Fields
An ::xowiki::Form contains form fields. Examples of form-fields
are for example the title or creator of a Page, or some form
specific attributes. The form-fields with their properties are
specified with a form. One can for example define,
- whether a field is optional or not (in the form-constraints),
- whether a field is shown to the user is in an input form,
- what fields in what formats should be placed in templates, or
- which fields are in included in a summary page of the form instances.
The form-fields are referred to by field names. The field name are either placed between @-characters in the template or form, or they can be used in HTML-input fields as value for "name" attributes, and they are used in the form-constraints.
5.2.2 Naming Conventions for Form-Fields
The form-fields of a ::xwoiki::Form are named based on the
following naming conventions. Field names starting with "_"
(underscore) refer to content repository attributes of the
FormPage. Other field names are user field names. The
content repository attributes are determined by the data model of
the OpenACS content repository. For example, every ::xowoki::Page
or ::xowiki::FormPage has the same content repository attributes.
The user-fields are additional fields, specific for a certain
form.
Examples for form fields referring to content repository
attributes:
_name: name of the page_page_order:section of the page_creator: creator field_title:title of the page_text:text content of the page (typically rich-text)_description:description of the page (typically plain text)_nls_language:locale for the page
5.2.3 Form-Constraints
Form-constraints are used to associate semantic properties and output formats to form-fields. XoWiki defines a set of types of form-fields. These types determine the input semantics and the output formatting of a form-field and distinguishes between an internal representation an an formatted value. In general, Form-constraints are a replacement for widget_specs for PageTemplates.
Form-constraints define
- Types of the form-fields, which determine
- semantic properties and output formats for form-fields.
- Form-constraints define as well the form-field configuration, which are attribute values for the types (e.g. what label should be used for a certain field, etc.
The Form-constraints are a list of form-field-specifications, which are defined below. The syntax is a Tcl list, so if a form-field-specification contains spaces, it has to be placed between curly braces.
The syntax of form-field-specification is influenced by the
syntax of non-positional arguments in OpenACS, where one can define
e.g. some-field:boolean,required. The syntax is
field-name:type,optional|required,att1=value1,att2=value2,...
The syntax is designed to be simple to address non-programmers as well (not so many curly braces like widget-specs for ad_form). In general, a form-field can be refined and retyped multiple times. Form fields can define validators, which are checked on auto-generated fields and on HTML fields.
The types of the form-fields are inherited from content-repository attributes, wherever applicable (e.g. boolean type for "anonymous instances", or date for modification_date, ...). Furthermore, it is possible to define for a form default configurations for all content repository attributes (@cr_fields) and all
user attributes (@fields).The poperties of form-fields are defined in the following
order
- by the core (pretty name of the attribute)
- by
@cr_fieldsor@fields(optional) - by the form constraints
The form constraints refer not only to form.fields, but use a
few special field names starting with an at-sign for other
purposes as well.
@cr_fields: assign properties to all content repository fields
For example:@cr_fields: hiddenis a short form of
_name:hidden _creator:hidden _title:hidden _description:hidden _nls_language:hidden@fields:symbolic name for all user fields@categories:turn categories optionally off for form entries of this form@table:specify, which form fields should be included in the summary table (see examples in [[http://alice.wu-wien.ac.at:8000/s5-xowiki-060/presentation?slideshow=1|what's new in xowki 0.60]]
5.2.4 Form-Field Classes
XoWiki defines the following classes of form-fields, where each item (bullet) under FormField specifies a type, which can be used in the form-constraints (see above).
-
FormField
FormField ist the base class for all form-fields, contains common parameters for all more specialized subclasses.
Common attributes: CSSclass, answer, default, disabled, display_field (default "true"), error_msg (default ""), feedback_answer_correct, feedback_answer_incorrect, form-widget-CSSclass, help_text (default ""), hide_value (default "false"), id, inline (default "false"), label, locale, name, object, required (default "false"), slot, spec (default ""), style, type (default "text"), validator (default ""), value (default "")
Primitive form field types- text: maxlength, size (default "80")
- numeric
- YYYY: maxlength (default "4"), size (default "4")
- user_id
- party_id
- party_id
- url: link_label
- detail_link: link_label (default "more...")
- image_url: border, border-width, botton, cssclass, float (default "left"), height, href, left, margin, margin-bottom, margin-left, margin-right, margin-top, padding, padding-bottom, padding-left, padding-right (default "10px"), padding-top, position, right, top, width
- password
- numeric
- textarea: cols (default "80"), rows (default
"2"), spell
(default "false")
- richtext: editor (default "xinha"), folder_id,
height, plugins, width, wiki (default "false")
- wym: CSSclass (default "wymeditor"), editor (default "wym"), height, width
- xinha: height, javascript, style
- richtext: editor (default "xinha"), folder_id,
height, plugins, width, wiki (default "false")
- hidden
form-field of type hidden, transmitted with the request
- inform
form-field with label and content with informational character - omit
form-field, which is not rendered at all (no label, no value); used for form-fields, which are defined, but not displayed (e.g. in a certain context) - label
- file:
link_label, size (default "40") - image:
border, border-width, botton, cssclass, float, height, href, left, margin, margin-bottom, margin-left, margin-right, margin-top, padding, padding-bottom, padding-left, padding-right, padding-top, position, right, top, width - submit_button
Common attributes: category_tree, options
- checkbox: horizontal (default "false")
-
radio: horizontal (default "false")
- boolean: default (default "t")
- scale horizontal (default "true"), n (default
"5")
- select: multiple (default
"false")
- DD
- HH24
- MI
- MM
- mon
- month
- abstract_page: as_box (default "false")
- form_page: form, where
- page: glob, type (default "::xowiki::Page"), with_subtypes (default "false")
Compound form field types
- date: display_format (default "%Y-%m-%d %T"), format
(default "DD MONTH
YYYY")
compound date field - event
compound field based von vevent micro format definition, contains start date/time, end date/time, summary and description
- text: maxlength, size (default "80")
In the itemized list, the classes of the form-fields
are printed in bold. The bild printed names can be used as
form-field types. The allowed attributes for every type are listed
as comma delimited parameters with default values. The attributes
defined for FormField are valid for all kind of
form-fields, the applicable attributes of subclasses can be
extended by own attributes. For example, every form-field has an
attribute required, which might be true or
false. The default value for required is false
(the value after word required between the curly braces).
In general, values for attributes are specified after an equal sign
"=". For the attribute required, =yes can be
omitted.
The following example is a form-field-specification, stating
that the form-field myinput is of type scale, it
is required and its attribute n has a value of
5.
Form-field-specification:
myinput:scale,required,n=5
We see in the itemized list, that scale is a subtype of radio (could be layouted horizontal or vertical, when horizontal is false).
Here is a short summary of the most important attributes of the
form-fields. Note that for content repository fields, many
attributes have predefined values determined by the type and name
of the fields (e.g. label is typically preset for e.g.
_name or _title):
- required: If set to true the form-field has
to be filled out. Default: false.
- inline: If set to true the form-field will be rendered without label and help-text within the text (e.g. in a table element of a user form). Default: false.
- label: The text used as label for the form-field. Default: name of the form-field
- id: HTML ID of the form-field, necessary for WCAG compliance and working with JavaScript. Default: name of the form-field
- help_text: Descriptive text about the form-field to show up below the form-field (not when inline is true)
- validator: name of a method to be executed when user
input has to be checked. For example, for the richtext
form-fields, the validator method is called
safe_html and checks for valid HTML. For
numeric fields, the validator method is called
numeric.
- default: a default value filled in, when the form-field content has no value yet.
- options: List of key value pairs too denote the options of multiple choice types. For some types of form fields, the options are determined my the type (e.g. month, DD, boolean, ...)
- horizontal: Will layout the options of
radiobuttons horizontally, if it is set true.
Default is false, for scale, default is
true.
- editor: For rich text, the editor can be chosen.
Currently, the only xinha and wym are
valid.
- CSSclass: this field can be used to set the CSS class of a form-field explicitely (the HTML attribute class). For example, for wym editor fields the CSS class of the textarea has to be set to wymeditor.
For the enumeration classes, some support exists to provide the values automatically (from the database).
- The attribute category_tree can be used to fill a radio
or select field with the values of categories by specifying the
appropriate category_tree. When pages get categories assigned,
these are as well mapped in the database via the classical OpenACS
category interface (this makes it e.g. simple to select all pages
with some categories assigned). This works the same way with radio
and select boxes.
- The form-field class form_page allows to fill fields with instances of certain forms. One can e.g. define a form "Person" with a few form instance pages. The form field will list the possible values for selection. It is as well possible to render the form field value in style of a wikipedia-like info box (only when multiple is false).
5.3 Programmable XoWiki Pages: ::xowiki::Object
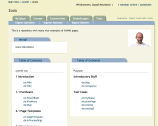 By using ::xowiki::Object. XoWiki can store (XOTcl) objects in the
content repository. The previously introduced directory object is
actually an instance of such an object. In general, instances of
::xowiki::Object can contain various variables and methods. Since
these objects can contain executable code, admin permissions are
required to edit these. When such an instance of ::xowiki::Object
is rendered, a method "content" is called. If this method exists,
the return value of this method is used as content of the page.
Therefore these objects provide easy means to implement dynamic
page fragments, the program code is kept version-controlled in the
database (content repository).
In the following "Hello World" example, we create a new object (here "de:cgi"). This page contains the proc "content", which is called for rendering. The variable "somevar" is shown here just as an example. It is accessible as an instance variable within the proc.
  set somevar 100

  proc content {} {
    return {Hello [[Wiki]]-World}
  }
Note that the output of the proc "content" can contain links to
named pages of the wiki, which will be rendered as usual (make an
edit hook, mark external links, etc.). The writer of the proc does
not have to take care of these Wiki semantics. The figure on the
right contains this ::xowiki::Object page included in the
two-column example from before.
6 Prototype Pages
Since version 0.36, XoWiki supports the concept of prototype pages.
In general, prototypes are some objects tailored with certain
properties, which are designed to be cloned and maybe modified
afterwards. This concept is close to the ideas of prototype-based
programming, where e.g. in the prototype based language self new
objects are created through cloning and modified as
needed.
Page prototypes of XoWiki are pages which are available in a directory (named ...xowiki/www/prototypes) and therefor available in every XoWiki package instance. When a resolver is called with an name it can't resolve, it looks as final resort into the prototypes directory and loads the page from there. If such as page is found, an ::xowiki::Page is instantiated and added to the pages of a folder. Whenever such a page it is updated though the web interface, new revision add added to the content repository. However, the original prototype on disk does not change and can be tailored for other applications in maybe different ways.
6.1 Usage Scenario
The typical usage scenario for prototype pages is a follows:
Suppose an OpenACS installation want to provide a tailored XoWiki
pages (maybe different from what the standard XoWiki installations
provide), which should be the same for every XoWiki package
instance on the system, but which can be modified by package
admins. In such cases, a prototype page can be used. Note that
prototype pages can be of different types (e.g. ::xowiki::Page or
::xowiki::Object) as well.
As an example take the index.page. In every new XoWiki instance, there is a page named en:index, which is exactly created this way. If one page wants to create a different en:index page for new instances, it could provide a different file in the prototypes directory. If on package admin wants to change the index page, he can simply edit it. By deleting the page from the web-interface, one forces a re-fetch on the next reference from the prototypes directory.
Note that when a new version of XoWiki is shipped along with modified prototype pages, one might have interest to make some package instances aware of this. If there was made no change to the prototype page, it can be deleted through the web interface to force a later refetch from the prototype directory. If the installation made changes, one should compare the new prototype with the version currently instantiated (accessible using the web interface) and amend the instantiated version accordingly.
Note that it is as well possible to load a prototype page
manually by calling e.g.
xowiki/?import_prototype_page=index. This command will
create a new revision of the index page.
6.2 Examples of Prototype Pages
The protoype pages are stored in the file system in the directory packages/xowiki/www/prototypes/. Every prototype page ends with .page6.2.1 index.page
Below is the slightly simplified prototype page for
en.index. The prototype is stored in the file system
in the file packages/xowiki/www/prototypes/index.page. The
prototype page is of type ::xowiki::Page
::xowiki::Page new -title "Index Page" -text {
<p>
This is the default start page of XoWiki. You can edit this page and save it to
provide a personalized look of the XoWiki instance. You can as well provide a
different index page through configuration.

You can also view the contents of the Wiki in a <a href='./weblog'>weblog</a> style.

For more details, consult the [[/xowiki-doc/|XoWiki documentation]].

</p>

>>left-col<<
{{recent -max_entries 25}}
>><<

>>right-col<<
{{last-visited -title "Last Visited" -max_entries 10 }}
<br/>
{{most-popular -title "Most Popular" -max_entries 10 }}
>><<
}
6.2.2 CGI.page
This example show a simple page of type ::xowiki::Object. When an instance of ::xowiki::Object is rendered, the method content of the instance is called. Therefore, we define here a simple proc content, which returns the content.
# -*- tcl-*-

::xowiki::Object new -title "CGI" -text {
  proc content {} {
    return "Hello \[\[Wiki\]\]-World. It is now [clock format [clock seconds]]."
  }
}
6.2.3 Standard Prototype Pages
XoWiki (as of xowiki 0.59) is distributed with the following
prototype pages:
- CGI.page
- CGI2.page
- CGI3.page
- ajax-chat.page
- announcements.page
- bib.page
- book.page
- categories-portlet.page
- contributors.page
- index.page
- news-item.page
- news.page
- podcast.page
- sitemap.xml.page
- sitemapindex.xml.page
- weblog-portlet.page
- weblog.page
7 XoWiki Configuration
7.1 Parameters
XoWiki supports a two level configuration of XoWiki instances. These are the
- package parameters (as for all other OpenACS packages), and
- the folder object (details below).
The package parameters are used for default parameters and simple configurations. For advanced configurations or providing multi-line values, the folder object is used. Furthermore, the folder object allows for computed values, obtained via inheritance, read from files or whatever. On the one hand side the values in the folder object are more powerful than the configuration via package parameter, but on the other hand, they require basic programing skills. In general, the values in the folder objects have a higher priority than the values in the package parameters.
The following package parameters are available:
- General parameters
- extra_css: Provide one or more additional css file for this XoWiki instance
- show_per_object_categories: If enabled it shows on a page view the categories assigned to this object.
- top_includelet: Specify an XoWiki portlet (defined in ::xowiki::portlet::*) to be included on top over every pages. In order or add e.g. on each page of this wiki instance a listing of the users currently active in this XoWiki instance, set the value of this parameter e.g. to 'presence -interval "10 minutes"'. The valid parameters are defined by the XoWiki portlets.
- template_file: Name of the adp file to be used for viewing XoWiki pages. Alternatively, one can use oacs-view for providing a view with the category-tree on the left or any other tailored view
- security_policy: Define the valid operations for different kind of users. Currently, two policies are predefined: ::xowiki::policy1 and ::xowiki::policy2. Policy1 requires for all destructive operations (deletes, delete_revision) and programmatical operations (involving Tcl code, e.g. editing the ::xotcl::Objects) package admin rights, for reindex site wide admin right). Policy 2 requires also for destructive operations site wide admin rights.
- production_mode: When this parameter is set, page edits or new pages are created in a "production" state, where they are not visible to users. These page have to be released via the admin pages.
- include_in_google_sitemap_index: When this parameter is set to 1 (default), this package instance will be included in the Google sitemap index.
- Optional features
- with_general_comments: Use general comments package.
- with_tags: Allow user to provide del.icio.us style tags to pages.
- with_user_tracking: Track page view usage per user.
- with_notifications: Allow the user to register notifications.
- with_delicious: Add a delicious button to the page.
- with_digg: Add a button to submit article to digg.
- with_yahoo_publisher: When specified, a button for adding the content to my.yahoo.com is added
- my_yahoo_publisher: Name of the publisher, when posting urls to my yahoo (use in connection with with_yahoo_publisher)
- URL and naming specific parameters:
- subst_blank_in_name: Normalize names of pages in a media wiki style. Most dominantly, spaces are turned into blanks.
- package_prefix: Part of the URL used before language and page name. This setting is used, when an URL is computed. Per default, the package_prefix is determined by the side not. When for example a default XoWiki instance is used as start page of OpenACS, the package_prefix can be set to /
- use_connection_locale: When
this flag is set, the connection locale (depending on the browser
setting) is used to determine the default language, in which a page is
presented, whenever possible. Users with different locales will see
under the same URL different content. Per default this flag is turned
off, and the package or system wide locale is used as default.
- XoWiki Form specific parameters:
- autoname: Automatically name items (form pages) of this instance
- display_page_order: Display page_order attribute (Section) in edit forms if possible.
- Page specific parameters:
- index_page: name of the page to be shown when the package instance is browsed (e.g. en:index)
- weblog_page: name of the page to show weblog (when clicking on del.icio.us style tags)
7.2 URL-Formatting
XoWiki allows multiple options to control how URLs of links are presented to the user. The computed URLs depend on two factors: the package prefix and the locale handling.7.2.1 Package prefix
Per default, every generated URL contains the name under which
XoWiki was mounted in the site-map. In certain situations, an
administrator user might wish to use an XoWiki instance also for
top-level pages. In order to achieve this, the package parameter
package_prefix (see above) can be set to
/ and a redirector file can be provided.
Redirection can be achieved via and index.vuh-file. A user can
place the following file under the name index.vuh
under .../openacs-4/www/index.vuh to redirect top-level request to
the specified XoWiki instance. Note, that one can still use e.g.
http://.../forums and other entries from the site-map.
The index.vuh file is only used in cases where the specified path
could not be resolved.
::xowiki::Package initialize -ad_doc {

  The script uses an XoWiki page as root page
  of the site. Here, the start page is /xowiki/ followed
  by the actual URL, as specified as the value after "-url" below.
  Replace this value, in case a different XoWiki instance
  name should be used.

  @author Gustaf Neumann (gustaf.neumann@wu-wien.ac.at)
  @creation-date July, 2006
  @cvs-id $Id: index.vuh,v 1.5 2006/09/15 16:45:00 gustafn Exp $
  } -parameter {
    {-m view}
    {-folder_id:integer 0}
  } -url /xowiki[ns_conn url]

  ::$package_id reply_to_user [::$package_id invoke -method $m]
  ad_script_abort
7.2.2 Locale Handling
XoWiki supports two approaches how to handle multiple languages in case the language of the page is not specified. The default behavior of XoWiki is that it uses the system locale to resolve the language (or more precisely, it tries to use first the locale specified for a package, if this is not specified, the system wide locale).
- system locale: en_US
- connection locale: de_DE (browser setting of a user)
- url:
/xowiki/page - resolved as:
/xowiki/en/page
If the package parameter use_connection_locale is
set to 0 by an administrator, the behavior changes and the user
might be served with different content.
- system locale: en_US
- connection locale: de_DE (browser setting of a user)
- url:
/xowiki/page - resolved as:
/xowiki/de/page
Note that two users might see under the same URL different content, depending on their browser settings.
When a page references without explicit language codes are used
within a page (like e.g. [[p1]]), the language of the
page containing this link is used as default value for the link.
XoWiki tries always to minimize the presented links.
Locale Option
The XoWiki includelets categories, categories-recent, toc, book and ::xowiki::Weblog have as well a "-locale" option which allows to listen only entries in a specified locale. The parameter allows
- empty string "": no special locale handling
- a locale (e.g. de_DE): to list only entries in this
locale
- the constant default, to list only the entries with the default locale (depending on package parameter), or
- the constant default+system to list the default locale and additionally the entries in the system locale, when the entry does not exist in the default locale.
Needless to say, the last case is the slowest.
7.3 The Folder Object
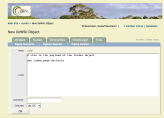 XoWiki creates per default an object per folder, through which the
XoWiki instance can be configured in detail. All the mentioned
package parameter can be provided as Tcl variables in the folder
object.
The folder object is and ::xowiki::Object and is named after the folder_id prefixed by "::". XoWiki does not allow to change the name of this object. Since these objects can contain executable code, admin permissions on the folder are required to edit these objects.
In order to set the index_page (the page to be displayed, when the package directory such as ./xowiki/ is visited) the folder object can be edited and the appropriate Tcl code can be inserted.
set index_page 2colsThe following example sets the index page to "de:2cols" (see also image on the right).
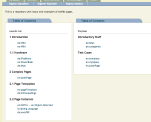 This page will be used as index page if it exists. We can define
the page "de:2cols" by creating for example a new ::xowiki::Page
with the following content to present a two-column display based on
categories. The left column shows pages from a tree with a name
matching "*toc*" (a table of contents), where the right side shows
pages categorized by some "Purpose".
   This is a repository with many nice examples of XoWiki pages.
  >>left-col<<
  {{categories -title "Table of Contents" -tree_name *toc*}}
  >><<

  >>right-col<<
  {{categories -title "Table of Contents" -tree_name Purpose}}
  >><<
7.4 Advanced JavaScript Configuration
The folder object allows a detailed configuration of an XoWiki instance. We describe here how to configure xinha in a more detailed way and how to use the rich text editor for editing the instance variables for ::xowiki::PageInstances. For more details about xinha configuration in general, consult the xinha resources on the xinha website .
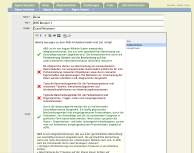 In the first example, we provide two changes from the default
configuration.
- We provide a more minimal configuration of xinha (less toolbar items, less plugins), and
- We configure stylist to load a special style file and provide labels for this.
The used plugins can be configured via the options field named plugins of the widget specification (for the full description of the widget specification for the rich text widget, consult api-doc/proc-view?proc=template::widget::richtext in your browser).
Firstly, we want to use only two plugins, namely OacsFs
(the file selector for inserting images from oacs folders and for
linking with internal resource) and Stylist (for the
second part of the example). Secondly, we want to reduce the
appearance of xinha and provide only a few controls in the toolbar.
This way it is possible to restrict the user such he is not able to
perform certain, maybe unwanted operations like changing fonts,
editing the HTML-source, etc). The configuration of the toolbar can
be performed by setting the JavaScript variable
xinha_config.toolbar. To set this JavaScript variable, we
need to execute a JavaScript command during the initialization of
xinha. For this purpose, we can use the filed javascript
in the options of the widget specification. The
widget_specification of multiple fields of an XoWiki instance can
be set via the Tcl variable widget_specs (see below for an
example).
The widget specs can be as well be used to configure certain plugins of xinha, such as e.g. the Stylist plugin, which allows a selective usage of styles in a xinha instance. The Stylist plugin provides a panel on the right side of the editor, in which currently applicable options are displayed. This context sensitive menu is controlled by the CSS style sheet, which specifies, in which context which options are valid. This can be used to provide e.g. a more semantic markup. In our example, we turn e.g. list items into a markup for correct and incorrect multiple choice answers. The configuration of the stylist allows furthermore to specify the labels to be displayed.
The described configuration can be performed by editing the directory object and setting the variable rich_text_spec to the rich text widget specification as follows.
set rich_text_spec {richtext(richtext),nospell,optional
  {label Content}
  {html {style {width: 100%}}}
  {options {editor xinha plugins {Stylist OacsFs} height 350px javascript {

  xinha_config.toolbar = [
    ['popupeditor', 'bold','italic','createlink','insertimage','separator'],
    ['killword','removeformat']
  ];

  xinha_config.stylistLoadStylesheet('/resources/xowiki/examples/xinha-mc-styles.css',
   {'p.angabe' : 'Aufgabenstellung',
   'p.loesungshinweis' : 'Lösungshinweis',
   'li.correct_choice' : 'Richtige Antwort',
   'li.incorrect_choice' : 'Falsche Antwort'});
  }}}}

set widget_specs [list *,text $rich_text_spec]
The variable rich_text_spec is used in the last line to
provide the general widget specifications. A widget specification
is here a pair consisting of a page selector and a widget
specification. The page selector has the form
page_name,var_name and specifies for which pages the
widget specification should be used. Both, the page_name
and the var_name might contain wild cards. In general,
multiple pairs can be used.
The same mechanism can be used as well to specify that rich text widgets should be used as well when editing ::xowiki::PageInstances (default: only plain text fields are used). Whereas for all other page types the page names are used in the selectors, we use the name of the page template in page instances. In our following example, we want to use the specified xinha configuration for variables named page_content of arbitrary page templates.
set xinha {richtext(richtext),nospell,optional
   {options {editor xinha plugins {
   GetHtml CharacterMap ContextMenu FullScreen InsertAnchor
   ListType TableOperations EditTag LangMarks Abbreviation OacsFs
   } height 350px }}
   {html {rows 15 cols 50 style {width: 100%}}}}
set widget_specs [list *,page_content $xinha]
7.5 Security Management
XoWiki provides support for security policies. XoWiki allows to define per instance different policies concerning rights on operations callable over the web. Only methods that are covered by an policy (i.e. explicitly mentioned in a policy) are callable. Depending on the object type or a predicate satisfiable from the page instance one can use for certain operations package level or instance level checking. A policy may contain context dependent permissions.
The same policy can be used for multiple XoWiki instances, or different XoWiki instances can use different policies. A policy can be switched simply by changing the package parameter. The policies fulfill two kinds of purposes:
- Policies are used to enforce access control based on methods on ::xowiki::Page objects.
- Policies are used to check access control, e.g. to control the availability of links. For example, a user, who has no rights to edit a page will not get the edit-link presented.
Below is the definition is the default policy for XoWiki (::xowiki::policy1).
Policy policy1 -contains {

  Class Package -array set require_permission {
    reindex swa
    rss none
    google-sitemap none
    google-sitemapindex none
    delete {{id admin}}
    edit-new {{{has_class ::xowiki::Object} swa} {id create}}
  }

  Class Page -array set require_permission {
    view none
    revisions {{package_id write}}
    edit {{package_id write}}
    make-live-revision {{package_id write}}
    delete-revision {{package_id admin}}
    delete {{package_id admin}}
    save-tags login
    popular-tags login
  }

  Class Object -array set require_permission {
    edit swa
  }
  Class File -array set require_permission {
    download none
  }
}
Policy1 defines package-level and Page level permissions, where on
the page level, we distinguish between permissions on arbitrary
Pages, on pages of class Object and File. Every permission is
defined as a pair of an operation and a right-specification. The
right-specification can have the following forms:
- swa: This operation requires the user to be a site wide admin.
- login: This operation requires the user to be logged in to the system (not for anonymous usage)
- none: There is no restriction for this operation, everybody is allowed to execute this operation.
- In addition, attribute based right specifications can
be provided in form of a Tcl list. This list my contain two forms:
- attribute-name privilege: An instance of the class has
to have the mentioned attribute. The policy checks, if for the
given operation a user has for the value of this attribute the
required privilege. For example in policy1
Class Page ....
edit {{package_id write}} ...
means for an instance of XoWiki named "xowiki" that for the edit operation for some page mypage (e.g.http://.../xowiki/mypage?m=edit) requires, that the user has a write privilege on the package_id of the page. - guard attribute-name privilege: optionally a guard can
be used for filtering checks. Policy1 defines for the
edit-newoperation on package, that in case the page contains tcl code (this is the case for pages of type Object), the user has to have admin rights on the package, for other cases, create rights are sufficient).
- attribute-name privilege: An instance of the class has
to have the mentioned attribute. The policy checks, if for the
given operation a user has for the value of this attribute the
required privilege. For example in policy1
XoWiki contains per default the policies policy1, policy2 and policy3.
- ::xowiki::policy1: Policy1 requires for all destructive operations (deletes, delete_revision) and programmatical operations (involving tcl code, e.g. editing the ::xotcl::Objects) package admin rights, for re-index site wide admin right).
- ::xowiki::policy2: Policy2 requires also for destructive operations site wide admin rights.
- ::xowiki::policy3: Policy3 is like policy2, but allows
to specify page level permissions. This is achieved, by using ting
the attribute based right specification not the package_id, but the
item_id. When policy3 is activated,
xowiki/admin/listdisplays icons (small locks) for altering the permissions on a per page basis.
8 Syndication
8.1 RSS Support
RSS support is based on the search contracts available in OpenACS 5.2. Each time a page is created or edited, this page is converted to plain ASCII and indexed by the search engine. At the same time, this page is updated in the syndication table, which can be exported in RSS 2.0 format.
The RSS channel obtains its name from from the title of the Folder Object. The description is taken as well from description of the folder object.
The items of the RSS channel correspond to the ::xowiki::Page, ::xowiki::PlainPage and ::xowiki::PageInstance objects. If the Page has a non-empty description it is used as description of the item. Otherwise the plain text representation of the content is used as description of the RSS item.
The RSS representation of a folder can be obtained via querying the index-page with the parameter "rss". If it has the value number followed by a small "d", it returns the pages which were changed over the last n days (for example, http://.../xowiki/?rss=10d returns the pages of the instance named "xowiki", which were changed during the last 10 days). It is possible to re-index the pages via http://.../xowiki/?reindex.
The following prerequirements of OpenACS must be met for syndication to work:
- The search package must be installed and mounted
- The tsearch2-driver must be installed and mounted (maybe, it works as well with the Oracle intermedia driver
8.2 Google Site Maps
For search machine optimization, XoWiki generates a [[https://www.google.com/webmasters/sitemaps/docs/en/protocol.html|Google site map]] for a single instance via http://.../xowiki/sitemap.xml and a site map index (containing all XoWiki instances) with http://.../xowiki/sitemapindex.xml.
In order to provide a global sitemapindex for your site (e.g.
http://yoursite/sitemapindex), provide the following
file as openacs/www/sitemapindex.tcl
::xowiki::Package initialize -ad_doc {

  Run a method of the package

  @author Gustaf Neumann (gustaf.neumann@wu-wien.ac.at)
  @creation-date Dec, 2007
  @cvs-id $Id$
  } -parameter {
  } -url /xowiki[ns_conn url]

  ::$package_id google-sitemapindex
  ad_script_abort
}
Exclude unwanted xowiki package instances from the Google
sitemap via the package parameter
include_in_google_sitemap_index.
8.3 Import and Export of XoWiki Pages
8.3.1 Import and Export of XoWiki Pages between XoWiki Instances
From every XoWiki instance it is possible to export its pages in a format that can be imported in other XoWiki instances (in the same OpenACS installation or in a different ones). It is possible to either export all XoWiki pages of an instance (via xowiki/admin) or selected pages (via xowiki/admin/list). During export, XoWiki tries to map internal OpenACS IDs (which are only meaningful within a single OpenACS installation) to symbolic values during export and to map these symbolic values again to corresponding IDs during import.
In particular, the following internal IDs are mapped between systems
- References between ::xowiki::FormPages and
::xowiki::Forms
- category_ids managed via form fields:
When enumeration form-fields (select, radio) are created with a category_tree specified, the pages are as well mapped to these categories; example:
audience2:select,required,category_tree=audience
When such a page is exported, XoWiki exports the page with a symbolic category tree included, which is used to regenerate the category tree during import (if needed) and to map the imported pages to these categories
- user_ids:
For the following kinds of fields, a mapping of user_ids as performed as well.
creation_user, modifying_user, assignee- form_fields having the attribute "is_party_id" set (e.g.
form_fields of type
user_id)
- The value is mapped to a new id, if the importing system has a user (party) with the same email address
- The value is mapped to a new id, if the importing system has a
user with the same username
8.3.2 Import and Export of XoWiki Pages from other Sources
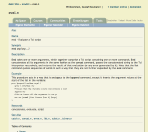 Import can be used as
well import objects from other sources, such as from e.g.
manual pages, HTML pages, or from database content, etc. Below is
an example script that converts manual pages into xowiki objects
suitable for import into an xowiki instance. Save the output to a
file and import it via xowiki/admin.
# XOTcl script to turn man pages into xowiki pages
# Gustaf Neumann, Jan 21, 2006
package require XOTcl; namespace import -force ::xotcl::*
package require xotcl::serializer

set rman /usr/local/bin/rman
set path /usr/local/man/mann

namespace eval ::xowiki {
  Class create Page -parameter {
    {lang en} {description ""} {text ""} {nls_language en_US}
    {mime_type text/html} {title ""} name text
  }

  set c 0
  set code 0
  set tmpfile /tmp/spool.[pid]
  set toc [Page create page[incr c] -name en:#toc]
  $toc set text "<h2>Manual pages</h2>\n<ul>\n"
  foreach full_name [glob /$path/*] {
    regexp {/([^/]+)$} $full_name _ man_page
    if {[regexp {^(.*)[.]([^.]+)$} $man_page _ name section]} {
      set p [Page create page[incr c] -name en:$man_page]
      $toc append text "<li>\[\[en:$man_page\]\]</li>\n"
      catch {exec $rman -f HTML $path/$man_page > $tmpfile}
      set f [open $tmpfile]; set page [read $f]; close $f
      file delete $tmpfile
      set text ""
      set state 0
      foreach l [split $page \n] {
        if {$state == 0} {
          # skip until body
          if {![string match "<body*" $l]} continue
          set state 1
          continue
        }
        if {[string match "*</body>*" $l]} continue
        if {[string match "*</html>*" $l]} continue
        if {[string match "*<code>*" $l]} {set code 1}
        if {[string match "*</code>*" $l]} {set code 0}
        if {$code} {regsub -all { } $l {\ } l }
        regsub -all {<a href='([^']+)'>[^<]+</a>} $l {[[en:\1]]} l
        append text $l\n
      }
      $p text [list $text text/html]
      append source [$p serialize]
    }
  }
  $toc append text "</ul>\n"
  $toc set text [list [$toc set text] text/html]
  append source [$toc serialize]
  puts $source
}
Below is another script for a similar task. This script produces serialized XoWiki objects from HTML files (here the OpenACS documentation pages). It reuses the file names as page names and the titles of the pages as XoWiki page titles. All content below BODY is inserted into the pages.
## A small script to load the OpenACS documentation into xowiki
## by Gustaf Neumann
## load doc pages into xowiki -gustaf neumann

# include path for loading tdom
lappend auto_path /usr/local/aolserver4/lib
package require tdom
package require XOTcl; namespace import ::xotcl::*
package require xotcl::serializer

set docpath /usr/local/openacs-4/packages/acs-core-docs/www/

namespace eval ::xowiki {
  Class create Page -parameter { {lang en} {description ""} {text ""}
    {nls_language en_US} {mime_type text/html} name title text
  }

  set c 0
  foreach docpage [glob $docpath/*.html] {
    set f [open $docpage r]; set data [read $f]; close $f
    dom parse -html $data doc
    $doc documentElement root

    set content ""
    foreach n [$root selectNodes //body/*] { append content [$n asHTML] \n }

    set p [Page create page[incr c] -name en:[file tail $docpage] \
      -title [[$root selectNodes //title] asText] \
      -text [list $content text/html]]
    puts [$p serialize]
  }
}
Finally, here is a small script for importing contents from the OpenACS package lars-blogger into an XoWiki instance. Adapt for this script the urls pointing to the package instances of your installation, save it e.g. in your global www directory of your OpenACS installation and execute it from there. In contrary to the examples above, this script directly inserts the content of lars-blogger into the XoWiki instances, so no manual import is involved.
One can use the prototype page "news" (via e.g. xowiki/news) to
view the contents in XoWiki. Don't forget to set
production_mode in the package parameters to 1 to have
control about the publish_status.
#
# Change the following variables to suit your environment
#
set lars_blogger_url /lars-blogger
set xowiki_url       /xowiki

set form_name en:news-item

#
# Do not change anything below
#
::xowiki::Package initialize -url $xowiki_url
set xowiki_package_id $package_id

array set root  [site_node::get_from_url -url /]
array set pinds [site_node::get_from_url -url $lars_blogger_url]

if {$root(package_id) == $pinds(package_id)} {
  ns_return 200 text/plain "Cannot find xowiki instance '$xowiki_url'"
  ad_script_abort
} elseif {$root(package_id) == $pinds(package_id) } {
  ns_return 200 text/plain "Cannot find lars_blogger instance '$lars_blogger_url'"
  ad_script_abort
}

#
# Setup is done, now import the content
#
ReturnHeaders
ns_write "Converting content from $lars_blogger_url ($pinds(package_id)) into $xowiki_url ($xowiki_package_id)<br>\n"

set form [$xowiki_package_id resolve_page $form_name method_var]
if {$form eq ""} {
  ns_write "Cannot load form into $xowiki_url<br>\n"
  ad_script_abort
}
ns_write "Using from $form_name ([$form item_id])<br><br>\n"

set objects [list $form]
db_foreach pinds_entry "
  select entry_id,creation_user, creation_ip, creation_date, entry_date, p.title,
     title_url as detail_link, content, content_format, draft_p
  from pinds_blog_entries p, acs_objects o
  where p.entry_id = o.object_id and p.package_id = $pinds(package_id)
" {
  if {$content_format ne "text/html"} {
    set content [ad_html_text_convert -from $content_format -to "text/html" $content]
  }
  lappend objects [::xowiki::FormPage new \
                       -page_template [$form item_id] \
                       -creator [person::name -person_id $creation_user] \
                       -instance_attributes [list detail_link $detail_link] \
                       -description $content \
                       -text $content \
                       -name en:pinds_$entry_id \
                       -title $title \
                       -publish_date $entry_date \
                       -publish_status [expr {$draft_p ? "production" : "ready"}]]
}
set msg [$package_id import -user_id [ad_conn user_id] -folder_id [$form parent_id] -objects $objects]
ns_write "$msg\n"
9 Including XoWiki Pages in other OpenACS applications
XoWiki provides a library function that makes it easy to include XoWiki pages in plain ADP pages. The XoWiki library contains the function "view", that lets a user include the output of the XoWiki renderer (HTML code) in some other page. This can be performed via ADP include-mechanism as follows:
<include src="/packages/xowiki/lib/view" url="@url@" template_file="view-links">
The variable "url" should point to the xowiki page to be
included (e.g. /xowiki/my_page).
10 More Information about XoWiki
For more information about XoWiki, the underlying components and the development towards workflows, consider the following sources:
- XoWiki FAQ
- Gustaf Neumann, Stefan Sobernig: XOTcl for OpenACS: An Introduction to XOTcl and the Basic Infrastructure of xotcl-core, Tutorial at the International OpenACS and DotLRN Conference: International Conference and Workshops on Community Based Environments, Antigua, Guatemala, February 2008 . [BibTex, postscript, pdf]
- Gustaf Neumann, Stefan Sobernig: Learning XoWiki: A Tutorial to the XoWiki Toolkit, Tutorial at the International OpenACS and DotLRN Conference: International Conference and Workshops on Community Based Environments, Antigua, Guatemala, February 2008 . [BibTex, postscript, pdf]
- Gustaf Neumann: Development the OO-Framework for OpenACS: Improving Scalability and Applicability, International OpenACS and DotLRN Conference: International Conference and Workshops on Community Based Environments, Antigua, Guatemala, February, 2008 . [BibTex, postscript, pdf]
- Gustaf Neumann: XoWiki Content Flow -- From a Wiki to a Simple Workflow System, in: Proceedings of 7th OpenACS / DotLRN Conference, Valencia, Spain, November, 2008 . [BibTex, postscript, pdf]
A Credits
XoWiki was and is developed by Gustaf Neumann, Institute of Information Systems and New Media, Vienna University of Economics and Business Administration. For more details, see here.


